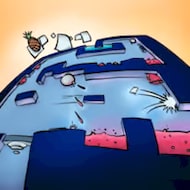
In Big Tower Tiny Square you start at the bottom of a tower with nothing but a jump button and a square avatar barely bigger than the hazards trying to kill it, and every floor above you was built by someone who wanted to see how far that setup could be pushed. There’s no story, no upgrades, no detours. Just up, and everything the tower can throw in the way of that.
Climbing One Screen at a Time
The tower is broken into individual single-screen sections rather than one continuous scrolling level, and each section is its own tightly designed puzzle of hazards. This structure matters more than it seems — because you can see the entire floor at once, the game expects you to plan a route before moving, not react blindly the way you might in a side-scroller where the next threat is off-screen. Dying on a floor you’ve already mapped out mentally feels completely different from dying on one you rushed into blind, and the game leans on that distinction constantly.
Wall-Jumping Is Not Optional
Once the tower moves past its opening floors, wall-jumping stops being a nice option and becomes the only way up. Bouncing off walls to gain height, redirect your fall, or squeeze past a hazard positioned to punish a straight jump is baked into the level design from fairly early on, and floors are built assuming you already have the technique down. Players who skip past learning it cleanly on the early, forgiving floors tend to hit a wall — often literally — once the tower stops giving them room to improvise.
Holding the Jump Button Changes Everything
The game’s jump has variable height: tap it for a short hop, hold it for a full-height leap, and the difference between the two is often the entire solution to a floor. Spikes positioned low enough that a short hop clears them but a full jump slams you straight into a hazard above are a recurring trick, and learning to read a floor for “tap or hold” before committing is one of the clearest markers of a player who’s actually improving rather than just memorizing through repeated deaths.
Checkpoints You Can’t See Coming
Checkpoints in Big Tower Tiny Square are invisible until you trigger them, usually placed on a safe platform right after a floor’s hardest obstacle. This design choice keeps runs fast — dying doesn’t send you back through content you’ve already solved — but it also means you never know exactly how close you are to safety, so pushing through a section that feels impossibly hard is sometimes just one hazard away from a checkpoint you didn’t know was there.
Early Floors Teach, Mid Floors Test
The opening stretch of the tower is deliberately gentle, introducing wall-jumps and safe platform timing without punishing mistakes too harshly. That gentleness ends the moment the tower’s mid-section begins, where single-hazard floors give way to rooms stacking multiple threats — lasers, turrets, and moving blades layered into the same small space, all active simultaneously. The jump from “learn one mechanic at a time” to “combine everything you’ve learned under pressure” is sharp, and it’s usually where new players hit their first real wall.
Lasers, Turrets, and Blades Together
Mid-tower rooms rarely ask you to deal with one hazard type in isolation. A laser sweeping the room might force you toward a wall a turret is already covering, while a spinning blade patrols the exact gap you’d otherwise use to escape both. Solving these rooms means identifying which hazard’s timing is the anchor — the one thing you build your route around — and treating the rest as obstacles to route past rather than trying to dodge everything reactively at once.
The Late Tower’s Perfect Spacing Problem
By the upper floors, Big Tower Tiny Square stops giving you room for error entirely. Jumps require buffered inputs — pressing jump slightly before you’d instinctively want to, so the game registers it at the exact right frame — and platform spacing narrows to the point where a wall-jump angled even slightly wrong sends you into lava instead of onto solid ground. This is the stretch of the game most responsible for its reputation as a rage climber, and it’s not an exaggeration; the margin for error here is genuinely thin.
- Moving platforms that require committing to a jump before they’re fully in position
- Lava pits that punish even minor wall-jump misalignment
- Spinning saw blades on tight, repeating patrol patterns
- Laser beams that sweep rooms already crowded with other hazards
What Beginners Get Wrong on the Way Up
The most common early mistake is treating every jump as a full-height jump by default, which the variable jump system actively punishes on floors built around short hops. The second most common mistake is rushing wall-jump sections before the technique is comfortable, since a half-learned wall-jump tends to fail in exactly the situations where the tower needs it most. Slowing down on the early floors to actually drill these mechanics, rather than pushing forward at the first sign of progress, pays off heavily once the mid-tower’s combined hazards show up.
How many floors does Big Tower Tiny Square have?
The tower is organized as a continuous stack of single-screen sections rather than a fixed numbered level list, with difficulty escalating steadily from bottom to top rather than resetting between sections.
Is wall-jumping required, or can you avoid it?
It’s effectively required past the early floors — the level design assumes you can wall-jump reliably, and most mid-to-late sections have no alternative route that avoids it.
Why do I keep dying on jumps that look easy?
Most of those deaths come down to jump height — holding the button for a full jump when the floor was built around a short tap, or the reverse. Reading each floor for which height it expects is usually the fix.
Big Tower Tiny Square never gets easier, it just gets more honest about what it’s asking of you. By the time you’re threading a buffered wall-jump between a laser sweep and a lava pit near the top of the tower, the tiny square you started with has effectively become an extension of your own timing — which is exactly the point.